Digitalisations in dental and dental technology have not stood still in recent times and have progressed at a tremendous pace. It is difficult to keep up with these developments and it is therefore important to assess which options there are and whether they make sense for the lab.
3D printing is part of digital dentistry and is becoming increasingly important. A good example is a laboratory Uwe Aupperlen Dental Technik GmbH, which is an innovative lab and deals with the latest digital techniques. They have been producing dental prostheses since the laboratory was founded in 1989. The first scanner arrived in the dental lab in 2007, ushering in a new era for the laboratory. Over the years, the CAD / CAM domain has expanded with various scanners and milling systems. As a means to reduce the load on our milling systems and to ensure further workflow in digital processes, they have decided to take advantage of the possibilities that a 3D printer can offer. The laboratory opted for an open material system from Asiga and started with the previous model the “FREEFORM PRO 2”. Nowadays it has been replaced by the Asiga Pro 4K, which uses UV LED light to cure the materials. The 3D printing materials of the company DETAX, as approved and validated by Asiga, together have coordinated the materials so that the requirements of the German Medical Devices Act (MPG) and Medical Class 1 and 2a are used for the production line. The materials used are:
Freeprint® ortho UV, for making splints, splints and various drilling templates and many more transparent parts.
Freeprint® tray UV, for manufacturing individual spoons for bite registration.
Freeprint® Cast UV, for fabrication of cast models and wax-ups.
Freeprint® temp UV, for manufacturing temporary crowns and bridges.
Freeprint® model UV, for manufacturing various dental models.
The “Otoflash G171” post curing unit and motherboard controlled UV flash device from NK-Optik with a protective gas atmosphere is used for the final (post) curing of printed objects. This post-curing device is required to finalize medical certified prints under nitrogen after cleaning with isopropanol (98% +) in an ultrasonic bath (1 + 2).
The different STL files for the respective 3D print jobs are generated with an open cad / cam software and scanners and in this case the program of “3shape” and “Zirkozahn” systems has been chosen. In order to obtain the medical device “Class IIa”, a liability rating for drilling templates, X-rays and splints, it is imperative for all of these involved to adhere to the prescribed procedure. The following illustrations and explanations provide a selection of the areas in which 3D printing is used in the laboratory.
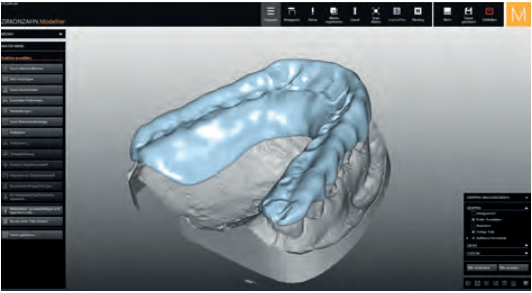
Splints
The custom occlusal splints are created in the “Zirkonzahn Bite Splint Module” and can be generated in approximately 20-40 minutes (Image 1).
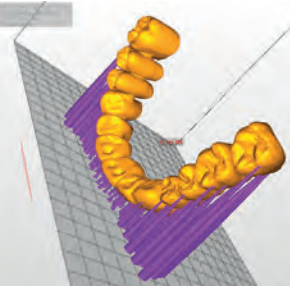
The design can then be placed in the “Asiga Composer Software” and is sent over the network to the 3D printer and then printed. The “Asiga Composer Software” allows the placement of individual or multiple print objects such as the splints. The size of the platform of the printer with the Freeform Pro 2 is capable of placing up to 6 parallel aligned splints. This of course depends on the printer, printer settings and the size of the splints or the models. The number of objects depends on the height of the splints and their placement angles relative to the printer platform (Image 2).
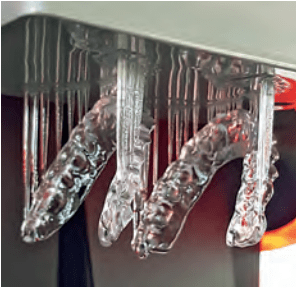
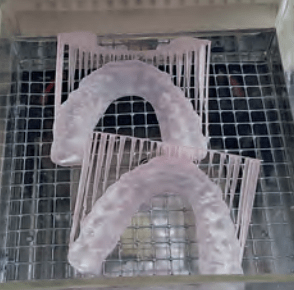
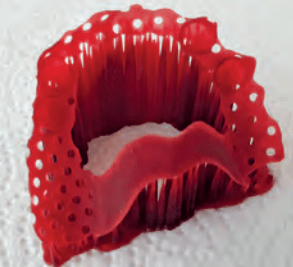
The sharper the angle to the platform is chosen, the thicker the polymerized layers through the object and the shorter the printing time. The finished printed Freeprint® Ortho UV (DETAX) splints are removed from the printer along with the print platform to release the printed objects from the print platform (Image 3).
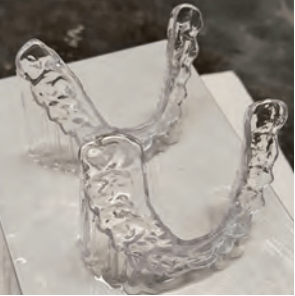
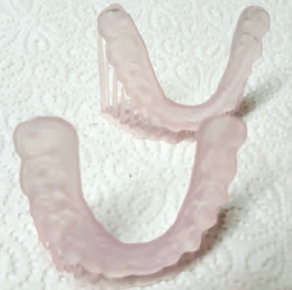
These can easily be removed from the printing platform with a spatula. The objects are also cleaned in the ultrasonic bath for 2 x 3 minutes (dirty and clean bath) with isopropanol. The cleaning process loosens the sticky, shiny coating from the splints and splints and becomes matte (Image 4).
After the final curing in “Otoflash G171” (Image. 5), the supporting print supports can be removed. The splints are placed on the model, finely ground and polished to a high gloss.
Further adjustments are still possible with the modeling resin Freeform® from DETAX. The usual rotating auxiliary instruments, such as polishing drills, etc., can be used for this to finish the splints. The previous processes such as post curing with the Otoflash and cleaning with the Isopropyl alcohol is so important that the more precisely this is done, the easier it is to polish with pumice powder and it thus becomes a more transparent high-gloss splint.
X-ray / drill templates and navigated drill templates
X-ray and drilling templates are created in the “3shape Implant Studio Software” using Digital Volume Tomography (DVT (DVT) (image 6, 7).
They allow for the precise location and thus accurate placement of the planned implants. templates are placed in the same way as the splints, printed with 3d printing fluid Freeprint® ortho UV (DETAX) (image. 8), removed from the printing platform and cleaned with the alcohol.
Finishing to a high gloss level is not absolutely necessary here. After final curing and removal of the support the splints can be placed on the models The selected X-ray prints can now be added, can now be inserted the mandibular X-ray template (image. 9) and a DVT can be made. then serves as the basis for producing the drilling template.Now the drilling template can be used with the correct guidance (image.10) and the implants can be planned.
Trays and bases for bite registration
The individual tray is produced in 3-shape with “Dental Designer” (image. 11) in approx. 10 minutes.
and placed with the “Asiga Composer Software” (image. 12). The files are sent to the 3D printer via the network. Once the print is finished with Freeprint® tray UV (DETAX), the platform rises and the individual tray can be removed from the platform. (image.13).
After detaching the printed objects, they are cleaned with isopropanol or cleaner in the ultrasonic bath (2x per 2 minutes) and the supporting support structures are removed after which they are cured with the Otoflash G171 flash curing device, with 2 x 2000 flashes. The trays are now ready to be polished if needed.
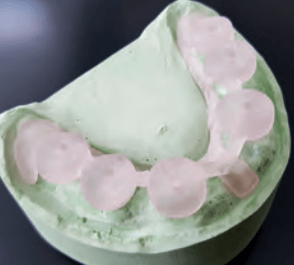
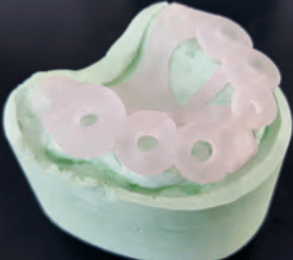
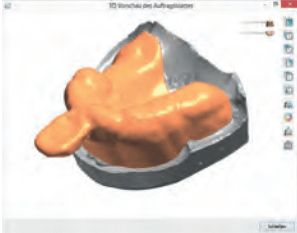
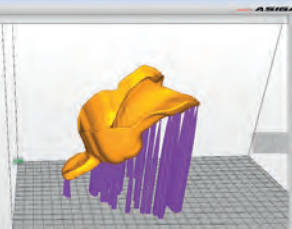
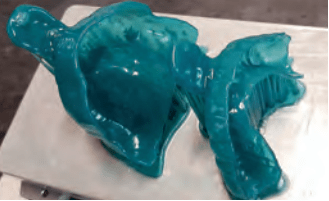
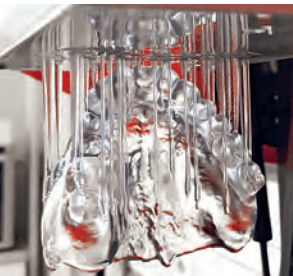
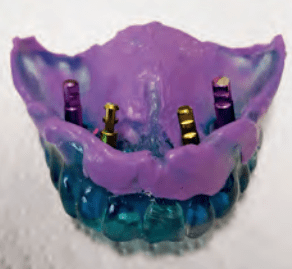
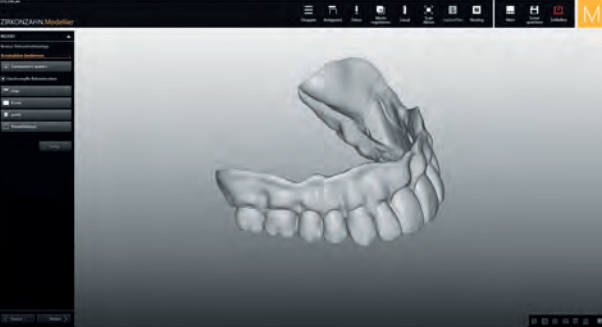
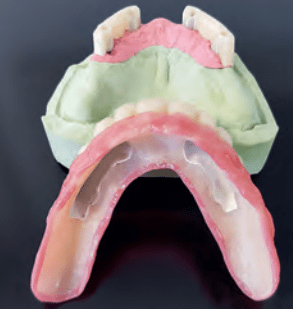
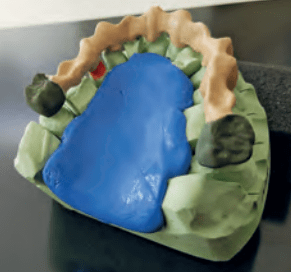
Maxillary prosthesis
A maxillary prosthesis is scanned with the Zirkonzahn scan system (Fig. 14) and printed out as a copy with the 3D printer (Fig. 15). This makes it possible to make an implant impression while at the same time adopting the existing bite position (Fig. 16). At the same time, all the information from the worn prosthesis is used in the development of a new one. Figure 17 generates the image from the edentulous jaw to the duplicated printed prosthesis for the DVT, by drilling template before implantation.
Prototypes – duplicate prosthesis
The originally produced prosthesis has previously been manufactured in the 3D printer before the final prosthesis is milled (Fig. 18, 19) before it can be attempted, a try-in prosthesis. In this way, adjustments can be made, the patient’s wishes can be identified and any errors noted and corrected, so that the final prosthesis meets all wishes and needs (Fig. 20).

Crowns, bridges, molded frames
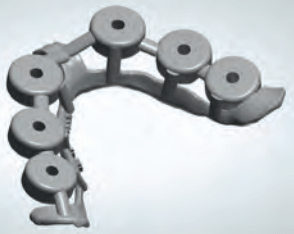
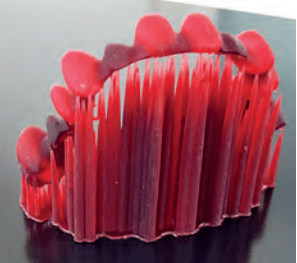
The STL data for the next casting pattern can be generated in the “3shape System” and “Zirkonzahn System”. A 12-unit bridge has been constructed using a modeling software (Fig. 21).
The resulting STL file is printed with a residue-free, fully combustible castable 3d print resin Freeprint cast (DETAX). This is printed with support as previously described (Fig. 22).
After the bridge has been cleaned in the usual isopropyl alcohol, and the cleaning and post-curing process described above (Fig. 23), it can be embedded in the investment and poured in the conventional manner.

After finishing the perfectly fitting bridge, it is blasted with oxide and cleaned and prepared for ceramic firing (fig. 24).
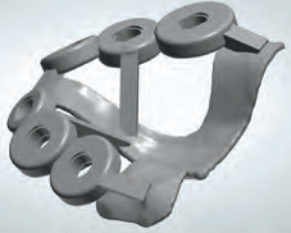
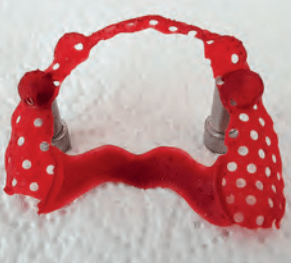
Frames can also be made in this way. Frame model is designed in the 3shape model cast module (Fig. 25, 26).
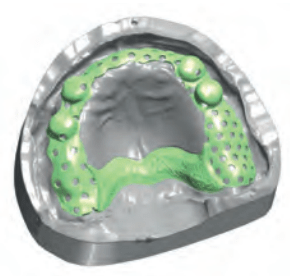
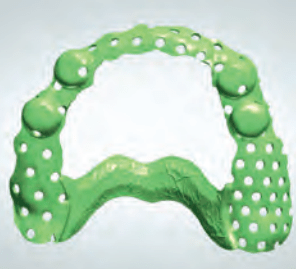
Once the file is ready from design it can be printed with the burnable print resin Freeprint® cast UV (DETAX), this object is also ready for embedding and casting (Fig. 27, 28).
Temporary crowns, bridges
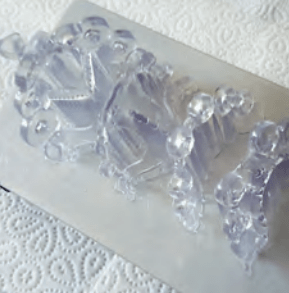
A bridge of 13 elements was created using the “Bridge Modeling Program” (Fig. 29) and printed out on the Asiga Freeform printer with Freeprint® temp UV (DETAX) (Fig. 30).
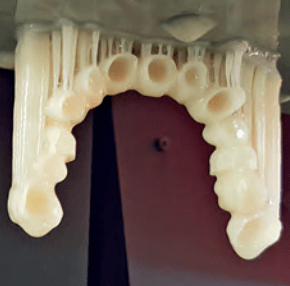
Freeprint® temp UV is a class IIa medical device. After the recurring and same cleaning process as well as the post curing, the printed bridge is stripped of the liquid 3d print resin residues. The after curing with Otoflash with N2 nitrogen is extremely important for the medical classification. The supports can be removed and the bridge placed on the model (Fig. 31). The bridge is processed with the usual and well-known processes and thus it gets a nice glossy finish with polishing. Now the bridge is ready for use as a temporary prosthesis (Fig. 32). Individualization prior to final polishing, final gloss and color can be achieved using the smart repair® system (DETAX).
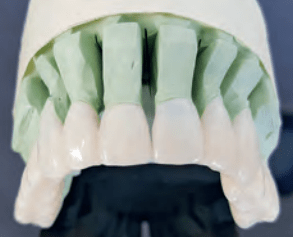
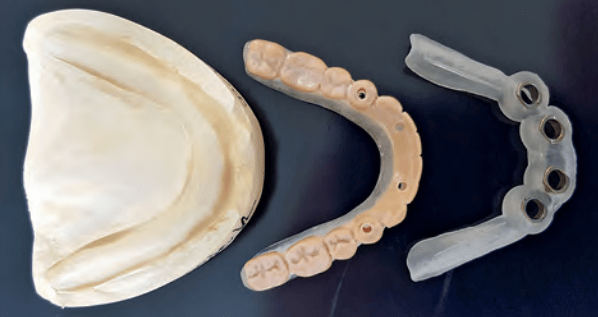
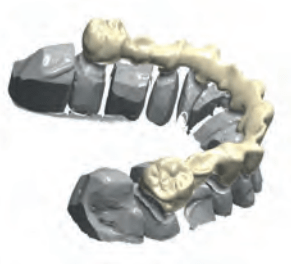
Models and working models
A model with removable stumps can be made digitally from a digital print using the “Modellbuilder” from Zirkonzahn (of course also Exocad or 3shape). The modeled dental model is sent to the printer for production and can be printed
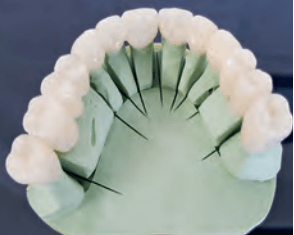
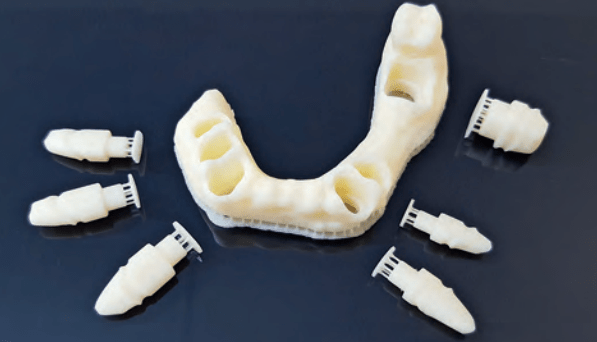
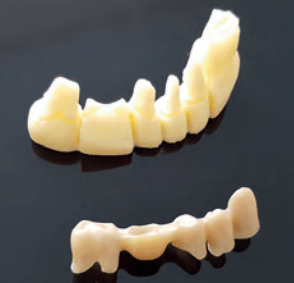
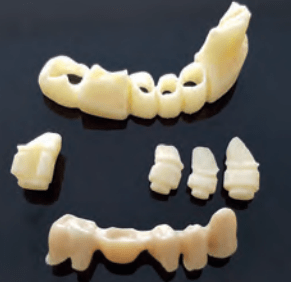
with Freeprint® model UV (DETAX) or the popular Asiga DentaModel. The fully printed dental arch with the corresponding die can now be detached from the build plate, cleaned according to known processes and placed in the Otoflash G171 light polymerization unit for final curing (Fig. 33). At the same time of printing, crowns or bridge can be milled from zirconia. See the finished model with bridges (fig. 34), model and bridge separated (fig. 35).
Equipment
- 3D printer: ASIGA Freeform PRO 2 (Asiga Max and Pro4K can also be used here)
- NK Optik Otoflash G 171
- Scanners: 3Shape, Zirkonzahn
3D printing materials (DETAX)
- Freeprint® ortho UV
- Freeprint® tray UV
- Freeprint® cast UV
- Freeprint® temp UV
- Freeprint® model UV
- Freeform® smartrepair® System
Alternatives can be used materials from Keystone, KeySPlint Soft, Pro3Dure, GC and Asiga materials. Look for the materials on our dental site for more information and order directly www.sgdentalshop.com/en.